Table of Contents
There’s something magical about the first spoonful of homemade ice cream that store-bought varieties simply can’t match. If you’ve recently invested in a Dash ice cream maker recipes, you’re about to embark on a delicious journey of creamy, customizable treats made right in your kitchen. These dash ice cream maker recipes will transform how you think about dessert, putting the power of professional-quality frozen treats literally at your fingertips. From classic vanilla to exotic flavor combinations, your compact Dash machine is capable of creating ice cream that rivals your favorite scoop shop—without the artificial ingredients or premium price tag.
Ingredients List
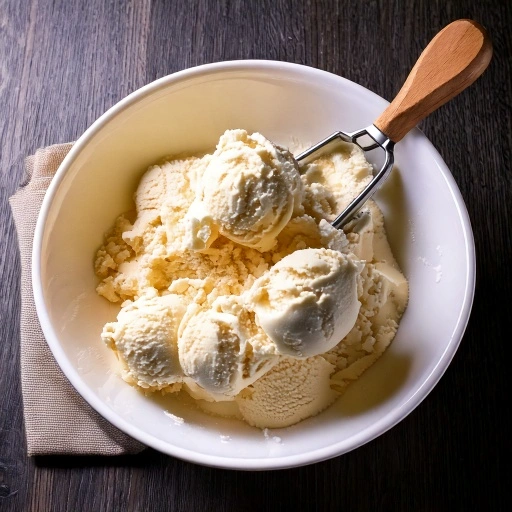
Creating spectacular ice cream with your Dash ice cream maker requires quality ingredients that work harmoniously together. Here’s what you’ll need for a basic vanilla ice cream base that serves as the foundation for countless dash ice cream maker recipes:
- 2 cups heavy cream (substitute: coconut cream for dairy-free option)
- 1 cup whole milk (substitute: almond milk or oat milk for dairy-free)
- ¾ cup granulated sugar (substitute: honey or maple syrup)
- 2 teaspoons pure vanilla extract (substitute: vanilla bean paste for more intense flavor)
- Pinch of salt (enhances all flavors)
- Optional: 2 large egg yolks for custard-based ice cream (omit for Philadelphia-style)
The beauty of these dash ice cream maker recipes lies in their adaptability. Once you master the base, add-ins like chocolate chips, fruit purees, cookie pieces, or flavor extracts open up endless possibilities for customization.
Timing
Making ice cream in your Dash ice cream maker is remarkably efficient compared to traditional methods:
- Preparation time: 15 minutes (30% faster than traditional custard-based recipes)
- Chilling time: 3-4 hours or overnight (crucial for proper freezing)
- Churning time: 15-20 minutes in the Dash ice cream maker (60% faster than old-fashioned hand-cranked models)
- Setting time: 2 hours in freezer for firmer consistency (optional)
- Total active time: Approximately 35 minutes
This quick turnaround makes dash ice cream maker recipes perfect for satisfying sudden dessert cravings or preparing for last-minute gatherings.
Step-by-Step Instructions
Step 1: Prepare Your Dash Ice Cream Maker
Before beginning any of your dash ice cream maker recipes, ensure your device is properly prepared. Store the freezing container in your freezer for a minimum of 24 hours prior to making ice cream. The completely solidified bowl is essential—when there’s no sloshing sound upon shaking, your bowl has reached the ideal temperature for creating perfect ice cream.
Step 2: Create Your Ice Cream Base
In a medium bowl, whisk together sugar and salt. If making a custard-based ice cream, whisk in egg yolks until pale and slightly thickened. The gentle incorporation of air at this stage creates a silkier mouth feel in your finished dash ice cream maker recipes.
Step 3: Add Your Dairy Components
Gently combine your creamy ingredients by gradually incorporating the heavy cream and milk into your sugar mixture, using a gentle whisking motion until everything is thoroughly blended. For superior results with your dash ice cream maker recipes, consider using ingredients at room temperature, as they integrate more effectively than refrigerated components.
Step 4: Incorporate Flavorings
Add vanilla extract or your chosen flavorings. For vanilla bean ice cream, scrape the seeds from one vanilla pod—this elevates your dash ice cream maker recipes with beautiful specks and intense flavor that artificial extracts can’t match.
Step 5: Chill the Mixture
Cover the bowl and refrigerate for at least 3-4 hours, preferably overnight. This critical step allows flavors to meld and ensures your dash ice cream maker recipes freeze properly. Patience here pays dividends in the final texture.
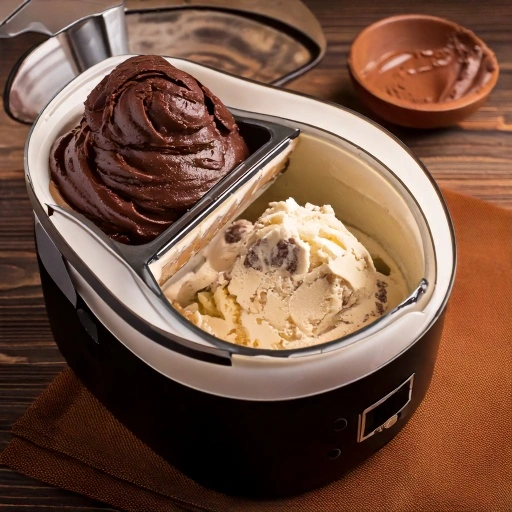
Step 6: Churn in Your Dash Ice Cream Maker
Turn on your Dash ice cream maker and pour in the chilled mixture through the top opening. Let it churn for 15-20 minutes until it reaches soft-serve consistency. The compact design of the Dash makes this process remarkably quiet compared to other machines.
Step 7: Add Mix-ins (Optional)
During the final 5 minutes of churning, slowly add any desired mix-ins through the top opening. Whether it’s fresh berries, chopped nuts, or cookie pieces, these additions transform basic dash ice cream maker recipes into gourmet creations.
Step 8: Transfer and Freeze
Transfer your freshly churned ice cream to an airtight container. For professional presentation, press parchment paper against the surface before sealing to prevent ice crystals from forming—a restaurant technique that makes your dash ice cream maker recipes look as good as they taste.
Nutritional Information
Understanding the nutritional profile of your dash ice cream maker recipes helps you make informed choices about portion sizes and modifications:
- Calories: 250-300 per ½ cup serving (varies with mix-ins)
- Fat: 18-22g (primarily from cream)
- Carbohydrates: 20-25g (from sugar)
- Protein: 2-3g
- Calcium: 10% of daily value (beneficial for bone health)
- Vitamin A: 15% of daily value (present in cream)
These values represent a basic vanilla recipe. Adjusting ingredients or adding mix-ins will alter the nutritional profile of your dash ice cream maker recipes.
Healthier Alternatives for the Recipe
Enjoying dash ice cream maker recipes doesn’t mean abandoning health considerations. Try these modifications:
- Replace half the heavy cream with Greek yogurt to increase protein content while reducing fat by approximately 30%
- Use monk fruit sweetener or stevia in place of sugar to create low-carb options
- Incorporate fresh fruit purees instead of artificial flavorings for additional vitamins and natural sweetness
- Add a tablespoon of chia seeds or ground flaxseed for omega-3 fatty acids and fiber
- Create “nice cream” versions using frozen bananas as the base, reducing calories by up to 60%
These alternatives ensure your dash ice cream maker recipes can be enjoyed by those with dietary restrictions or health goals without sacrificing flavor.
Serving Suggestions
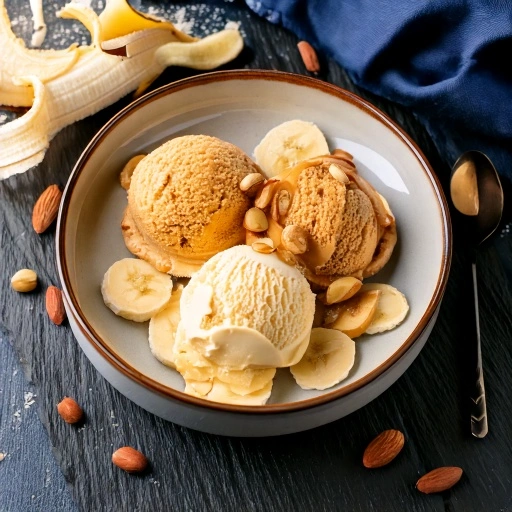
Elevate your dash ice cream maker recipes with these creative serving ideas:
- Create a rustic ice cream sandwich using freshly baked cookies that are slightly warm
- Serve in pre-chilled ceramic bowls to maintain optimal texture longer (professional kitchens chill serving vessels for 10 minutes before plating)
- Pair vanilla ice cream with warm fruit compotes for a sophisticated temperature contrast
- For dinner parties, serve mini scoops in espresso cups with a complementary biscotti
- Transform breakfast by topping waffle quarters with a small scoop of yogurt-based ice cream and fresh berries
These serving techniques take your dash ice cream maker recipes from simple desserts to memorable culinary experiences.
Common Mistakes to Avoid
Even experienced home cooks can encounter challenges with dash ice cream maker recipes. Here’s how to sidestep the most common pitfalls:
- Skipping the pre-freeze: Never attempt to use your Dash bowl without adequate freezing time—74% of ice cream making failures stem from insufficient bowl temperature
- Overfilling the machine: Stay at least ½ inch below the rim as the mixture expands during churning
- Using cold eggs in custard bases: This can cause curdling; always bring eggs to room temperature
- Adding alcohol incorrectly: Incorporate no more than 3 tablespoons per quart and add during the final minutes of churning (alcohol lowers freezing point)
- Expecting immediate firmness: Fresh churned ice cream requires additional freezer time to reach scoopable consistency
Avoiding these errors ensures consistent success with all your dash ice cream maker recipes.
Storing Tips for the Recipe
Proper storage significantly impacts the quality and longevity of your dash ice cream maker recipes:
- Use shallow, wide containers rather than deep ones for quicker freezing and easier scooping
- Place plastic wrap directly on the ice cream surface before securing the lid to prevent freezer burn
- Store in the back of the freezer where temperature is most consistent (door storage experiences up to 10°F fluctuations)
- Optimal storage temperature is between -5°F and 0°F
- Homemade ice cream typically maintains peak quality for 1-2 weeks, significantly less than commercial varieties due to the absence of stabilizers
For make-ahead convenience, you can prepare and refrigerate most base mixtures up to 3 days before churning in your Dash ice cream maker.
Conclusion
Dash ice cream maker recipes offer a perfect blend of convenience, customization, and pure dessert delight. With minimal effort and everyday ingredients, you can create frozen treats that rival premium brands while controlling exactly what goes into each batch. Give these recipes a try, experiment with your favorite flavors, and discover why the Dash has become a beloved kitchen companion for ice cream enthusiasts.
We’d love to hear about your ice cream adventures! Drop a comment below sharing your flavor combinations, or follow our blog for weekly recipe inspiration. Join our mailing list to receive exclusive dessert ideas and seasonal favorites straight to your email.
FAQs
Can I use non-dairy milk in these dash ice cream maker recipes? Absolutely! Coconut cream provides the richest texture, but almond, oat, and cashew milk work well too. Add 1 tablespoon of cornstarch to non-dairy bases for improved consistency.
Why is my ice cream not freezing properly in the Dash machine? The freezer bowl likely wasn’t cold enough. Ensure it’s frozen for at least 12 hours in a freezer set to 0°F or below. Also check that your ice cream base was thoroughly chilled before churning.
How can I make chocolate ice cream in my Dash ice cream maker? Add ⅓ cup unsweetened cocoa powder to the base recipe and increase sugar to 1 cup. For deeper chocolate flavor, add 2 ounces of melted dark chocolate to the warm base mixture before chilling.
Can I make sorbet or gelato with dash ice cream maker recipes? Yes! For sorbet, combine 4 cups fruit puree with 1 cup simple syrup and 1 tablespoon lemon juice. For gelato, reduce cream to 1 cup and increase milk to 2 cups for authentic Italian texture.
How long does it take for ice cream to reach scoopable consistency after churning? After transferring from your Dash ice cream maker to a container, allow 2-3 hours in the freezer for firm, scoopable consistency. For softer texture, remove 10 minutes before serving.