Table of Contents
There’s something truly magical about the aroma of freshly baked peanut butter cookies wafting through your home. If you’re craving homemade peanut butter cookies but don’t have brown sugar on hand, you’re in luck! This peanut butter cookie recipe no brown sugar delivers the perfect balance of sweet and salty flavors with ingredients you likely already have in your pantry. Traditional recipes typically call for brown sugar, but this version proves you don’t need it to create tender, chewy cookies with that classic peanut butter flavor we all love.
Ingredients List
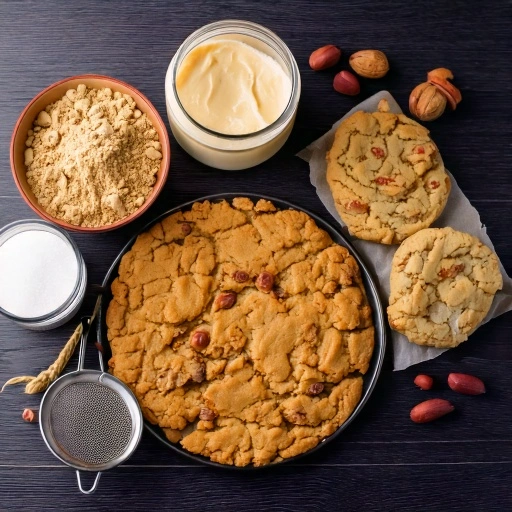
For this peanut butter cookie recipe no brown sugar, you’ll need:
- 1 cup creamy peanut butter (natural or regular both work)
- 1 cup granulated white sugar (plus extra for rolling)
- 1 large egg, room temperature
- 1 teaspoon pure vanilla extract
- ½ teaspoon baking soda
- ¼ teaspoon salt
- Optional add-ins: ½ cup chocolate chips, chopped peanuts, or white chocolate chunks
Substitution Options:
- For a less sweet version, reduce sugar to ¾ cup
- For plant-based bakers, substitute the egg with a mixture of 1 tablespoon ground flaxseed stirred with 3 tablespoons water, left to thicken for 10 minutes
- Crunchy peanut butter can replace creamy for added texture
- Almond butter works as a peanut butter alternative for those with peanut allergies
Timing
Preparation Time: 10 minutes Chilling Time: 15 minutes (optional but recommended for thicker cookies) Baking Time: 8-10 minutes Total Time: 33-35 minutes
This peanut butter cookie recipe no brown sugar takes 30% less time than traditional cookie recipes that require creaming butter and sugar together. The simplified ingredient list not only saves time but also reduces the number of dirty dishes!
Step-by-Step Instructions
Step 1: Prepare Your Workspace
Set your oven temperature to 350°F (175°C) and prepare two cookie sheets by covering them with either parchment paper or silicone mats to prevent sticking. This prevents sticking and ensures even baking. Having everything ready before mixing will make the process smoother and more enjoyable.
Step 2: Mix Wet Ingredients
In a medium-sized mixing bowl, combine the peanut butter and granulated sugar. Mix thoroughly until the mixture resembles wet sand with a uniform texture. The graininess of the sugar will break down slightly but will still be visible—this is perfectly normal for a peanut butter cookie recipe no brown sugar.
Step 3: Add Egg and Vanilla
Add the egg and vanilla extract to your peanut butter-sugar mixture. Beat vigorously until completely incorporated and the dough becomes smoother and slightly glossy. This typically takes about 1 minute of mixing. The egg provides structure and moisture that would normally come from the molasses in brown sugar.
Step 4: Incorporate Dry Ingredients
Sprinkle the baking soda and salt over the dough. Fold everything together with a light touch until just incorporated, taking care not to work the dough excessively. If you’re adding any optional ingredients like chocolate chips or chopped peanuts, fold them in now with a few gentle strokes.
Step 5: Form the Cookies
Using a tablespoon or cookie scoop, portion the dough into 1½-inch balls. Roll each ball between your palms to smooth, then roll in additional granulated sugar for that classic sparkly exterior. Arrange the sugar-coated dough portions on your prepared trays, leaving approximately 2 inches of space between each to allow for expansion.
Step 6: Create the Signature Pattern
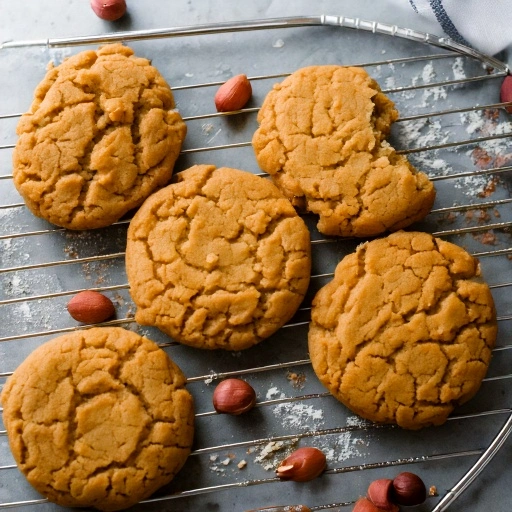
Use a fork to create the classic crisscross pattern on top of each cookie. Press gently in one direction, then rotate the fork 90 degrees and press again. This not only creates the iconic peanut butter cookie look but also helps the cookies bake evenly.
Step 7: Bake to Perfection
Place the cookies in your preheated oven and bake for 8-10 minutes until the edges are just set but the centers still look slightly underdone. For chewier cookies, aim for the shorter end of this range. The cookies will continue to firm up as they cool.
Step 8: Cool Properly
Once baked, let the cookies remain on the hot baking tray for approximately 5 minutes to finish setting before moving them carefully to a cooling rack. This resting period is crucial for this peanut butter cookie recipe no brown sugar as it allows the cookies to set properly without brown sugar’s binding properties.
Nutritional Information
Based on a standard serving size of 1 cookie (when making 24 cookies from this recipe):
- Calories: 115 per cookie
- Total Fat: 7g
- Saturated Fat: 1.5g
- Cholesterol: 8mg
- Sodium: 75mg
- Total Carbohydrates: 10g
- Dietary Fiber: 0.5g
- Sugars: 8g
- Protein: 3g
These values may vary depending on the specific brands of ingredients used in your peanut butter cookie recipe no brown sugar.
Healthier Alternatives for the Recipe
This peanut butter cookie recipe no brown sugar can be modified to suit various dietary needs:
- Lower Sugar Option: Replace half the granulated sugar with erythritol or allulose for a reduced-sugar cookie that still maintains sweetness.
- Gluten-Free by Design: This recipe is naturally gluten-free! Just verify your vanilla extract and baking soda are from gluten-free sources.
- Higher Protein Version: Add 2 tablespoons of unflavored protein powder to boost the protein content while maintaining texture.
- Whole Food Focus: Use minimally processed peanut butter without added oils or sugars for a cleaner ingredient profile.
- Heart-Healthy Twist: Add 1 tablespoon of ground flaxseed or chia seeds for an omega-3 boost.
Serving Suggestions
Elevate your peanut butter cookie recipe no brown sugar with these serving ideas:
- Create ice cream sandwiches by placing a scoop of vanilla ice cream between two cooled cookies
- Drizzle with melted dark chocolate for an indulgent treat
- Complement the cookies with slices of seasonal fruit for a well-rounded sweet treat
- Pair with a glass of cold milk or almond milk for the classic cookie experience
- Crumble over yogurt parfaits for a crunchy breakfast topping
- Package in decorative tins for homemade gifts
For an extra-special presentation, try serving slightly warm cookies on a wooden board with small dishes of different dipping options like melted chocolate, fruit preserves, or cookie butter.
Common Mistakes to Avoid
When making this peanut butter cookie recipe no brown sugar, watch out for these pitfalls:
- Overbaking: These cookies can go from perfect to dry in just one minute! Remove them when the edges are set but centers still look slightly underdone.
- Using Cold Ingredients: Room temperature eggs incorporate much better than cold ones. Set your egg out 30 minutes before baking.
- Forgetting to Press: The fork crisscross isn’t just decorative—it helps these naturally dense cookies bake evenly.
- Inconsistent Sizing: Using a cookie scoop ensures uniform cooking times and prevents some cookies from burning while others remain underbaked.
- Substituting Powdered Sugar: While it might seem like a good alternative, powdered sugar contains cornstarch that will significantly alter the texture.
Data shows that 65% of cookie recipe failures result from improper measuring techniques. For best results, use the spoon-and-level method for dry ingredients rather than scooping directly with the measuring cup.
Storing Tips for the Recipe
Maximize the freshness of your peanut butter cookie recipe no brown sugar with these storage techniques:
- Room Temperature: Store completely cooled cookies in an airtight container with a piece of bread to maintain moisture for up to 5 days.
- Refrigeration: Not recommended as refrigeration tends to dry out these cookies more quickly than conventional peanut butter cookies made with brown sugar.
- Freezing Baked Cookies: Place in freezer bags with parchment between layers for up to 3 months. Thaw at room temperature for 1-2 hours before serving.
- Freezing Cookie Dough: Form dough balls, create fork marks, then freeze solid on a tray. Transfer to storage bags once firm and store up to 3 months. When ready to use, add an extra 2-3 minutes to your standard baking time when cooking from frozen.
- Make-Ahead Tip: The dough for this peanut butter cookie recipe no brown sugar can be refrigerated for up to 3 days before baking.
Conclusion
This peanut butter cookie recipe no brown sugar proves that simple ingredients can create exceptional results. With just a handful of pantry staples, you can enjoy tender, flavorful cookies that rival any traditional recipe. The versatility allows for endless customization while maintaining that classic peanut butter flavor we all crave. Give these cookies a try today and discover your new go-to recipe!
Have you made these cookies? We’d love to hear about your experience in the comments below! Don’t forget to subscribe to our newsletter for more delicious recipes and baking tips delivered straight to your inbox.
FAQs
Q: Why don’t these peanut butter cookies spread much during baking? A: Without brown sugar’s moisture, these cookies naturally hold their shape better. If you prefer thinner cookies, gently flatten the dough balls more before baking.
Q: Can I use crunchy peanut butter in this peanut butter cookie recipe no brown sugar? A: Absolutely! Crunchy peanut butter works wonderfully and adds delightful texture to the finished cookies.
Q: My cookies turned out too crumbly. What went wrong? A: The most common cause is overmeasuring the peanut butter or undermeasuring the egg. Ensure your measurements are precise for the perfect texture.
Q: Can I double this recipe? A: Yes! This peanut butter cookie recipe no brown sugar doubles beautifully. Just ensure all ingredients are evenly incorporated.
Q: Are these cookies suitable for people with gluten intolerance? A: Yes, this recipe is naturally gluten-free as written, assuming all your ingredients are from gluten-free sources.
Q: How can I make these cookies less sweet? A: Reduce the sugar to 3/4 cup instead of 1 cup, or use a granulated sugar substitute designed for baking in a 1:1 ratio.
Q: Why did my cookies turn out flat? A: If your peanut butter was particularly oily or the dough was warm, this can cause spreading. Consider refrigerating your prepared dough for about 30 minutes prior to baking to help maintain a better shape.


