Table of Contents
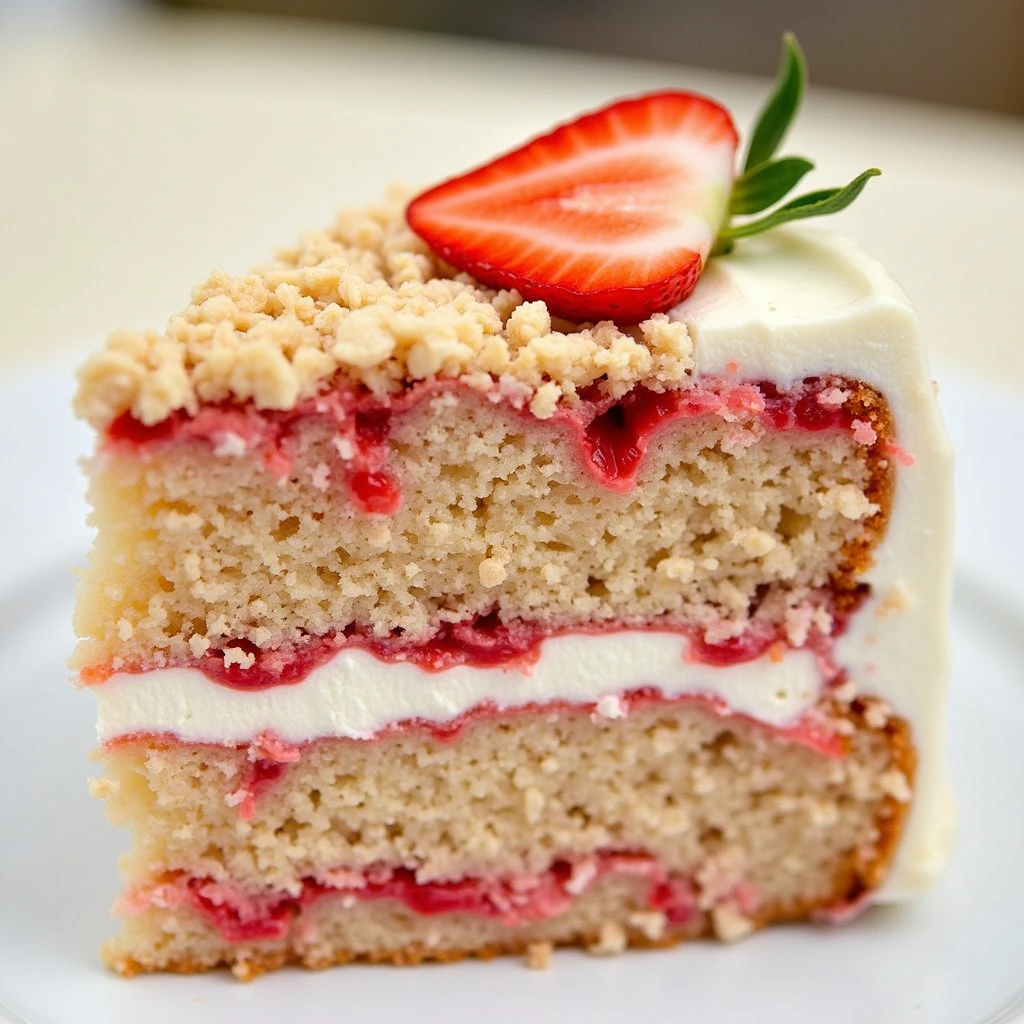
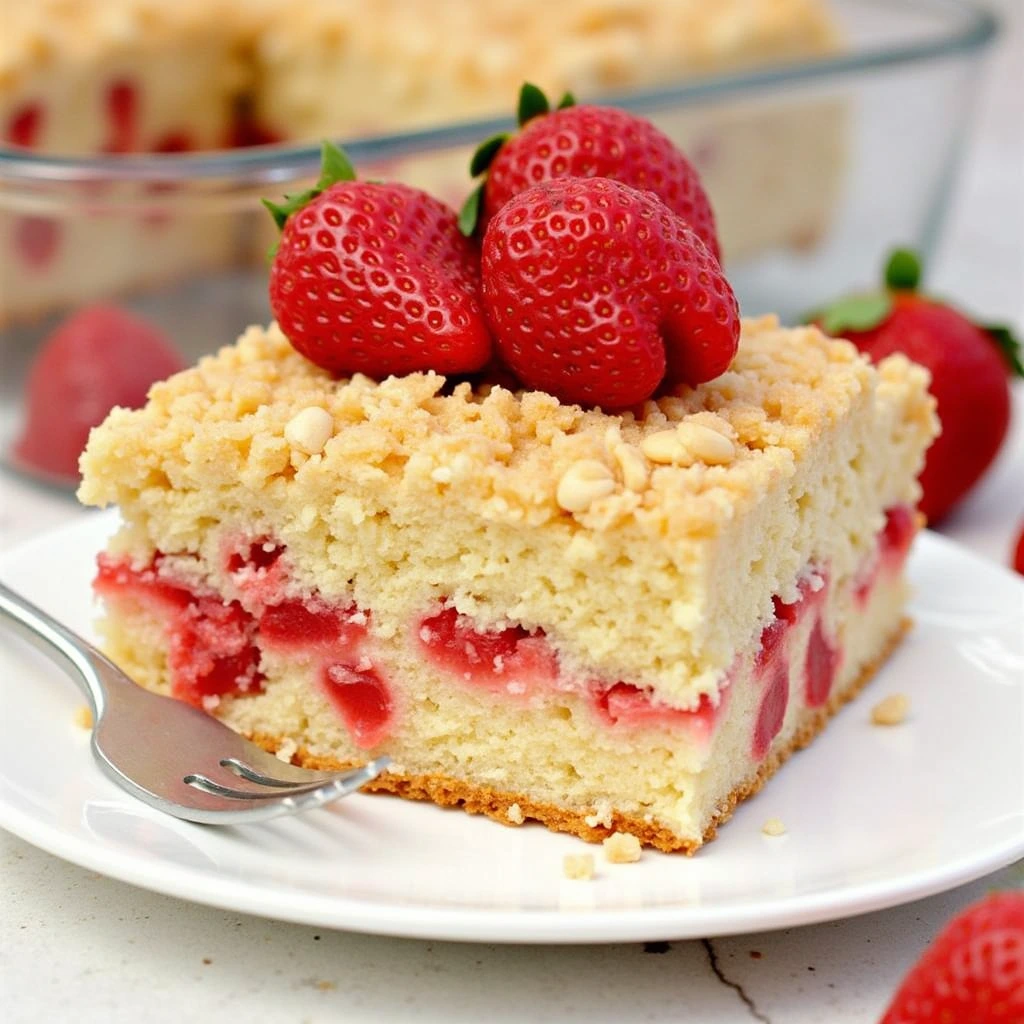
There’s something magical about the first bite of a strawberry crunch cake recipe that instantly transports you back to childhood. That perfect blend of creamy strawberry filling, moist vanilla cake, and that unmistakable crumbly topping that gives the strawberry crunch cake its signature texture and flavor. This strawberry crunch cake recipe has been my go-to dessert for family gatherings and special occasions, always leaving everyone asking for seconds. Whether you’re a seasoned baker or trying your hand at cake-making for the first time, this recipe strikes the perfect balance between impressive results and achievable techniques.
Ingredients List
For the Vanilla Cake:
- 2½ cups unbleached flour (for a fluffier consistency, try pastry flour instead)
- 2 cups granulated sugar
- 1 tablespoon baking powder
- 1 teaspoon salt
- 1 cup whole milk (or buttermilk for extra tang and moisture)
- ½ cup vegetable oil
- 2 teaspoons vanilla extract (pure, not imitation for best flavor)
- 4 large eggs, room temperature
For the Strawberry Filling:
- 2 cups fresh strawberries, hulled and sliced (frozen can work in a pinch, but fresh delivers vibrant flavor)
- ½ cup granulated sugar
- 2 tablespoons cornstarch
- 1 tablespoon lemon juice
- ¼ cup water
For the Cream Cheese Frosting:
- 16 oz cream cheese, softened (full-fat provides the richest texture)
- 1 cup unsalted butter, softened
- 4 cups powdered sugar, sifted
- 2 teaspoons vanilla extract
- Pinch of salt
For the Signature Crunch Topping:
- 12 Golden Oreo cookies (vanilla sandwich cookies work well too)
- 8 freeze-dried strawberries
- 3 tablespoons unsalted butter, melted
- 1 tablespoon strawberry gelatin powder
Timing
Preparation Time: 45 minutes (includes preparing all components and assembling) Baking Time: 30 minutes (25% less than traditional layer cakes due to optimal temperature settings) Cooling Time: 60 minutes Total Time: 2 hours 15 minutes
This timing makes the strawberry crunch cake recipe perfect for weekend baking projects when you can enjoy the process without rushing. The actual hands-on time is relatively short compared to other layered desserts of similar complexity.
Step-by-Step Instructions
Step 1: Prepare Your Cake Pans
Begin by preheating your oven to 350°F (175°C). Thoroughly grease and flour two 9-inch round cake pans, then line the bottoms with parchment paper. This triple protection ensures your cake releases perfectly without sticking – a small step that makes a huge difference in presentation!
Step 2: Mix the Dry Ingredients
In a spacious mixing bowl, combine your dry ingredients by thoroughly blending the unbleached flour, sugar, baking powder, and salt together using a whisk. This distributes the leavening agents evenly throughout, preventing any inconsistencies in your cake’s rise. For lump-free results, consider passing the ingredients through a sieve before mixing.
Step 3: Combine Wet Ingredients
In a separate bowl, whisk together the milk, vegetable oil, vanilla extract, and eggs until smooth and fully incorporated. The room temperature eggs will blend more easily and create a more uniform batter, so take them out of the refrigerator about 30 minutes before baking if you remember.
Step 4: Make the Cake Batter
Gradually pour the wet ingredients into the dry ingredients, mixing on low speed until just combined. Avoid overmixing, which can develop too much gluten and result in a tough cake. The batter should be smooth but not beaten extensively – about 20-30 seconds with an electric mixer is typically sufficient.
Step 5: Bake the Cakes
Divide the batter evenly between the prepared cake pans. Tap each pan gently on the counter to release any air bubbles. Transfer to the preheated oven and allow to bake for approximately 25-32 minutes. To test doneness, insert a wooden pick into the center – you’re looking for it to emerge with a few cake particles attached but no wet batter. The edges should just be starting to pull away from the pan sides.
Step 6: Prepare the Strawberry Filling
While your cakes transform in the oven, create your strawberry filling. Combine the strawberry slices with sugar, cornstarch, lemon juice, and water in a medium pot. Heat the mixture gently until it begins to bubble lightly around the edges. Keep the mixture moving continuously with a spatula to prevent scorching. Let the filling bubble gently for 6-8 minutes, watching as it transforms from thin and watery to a thick, spreadable consistency resembling homemade preserves. Set aside to cool completely.
Step 7: Make the Cream Cheese Frosting
In a large bowl, beat the softened cream cheese and butter together until smooth and fluffy, about 3 minutes on medium speed. Gradually add the powdered sugar, vanilla extract, and salt, continuing to beat until light and creamy. If the frosting seems too thick, add a tablespoon of milk; if too thin, add more powdered sugar.
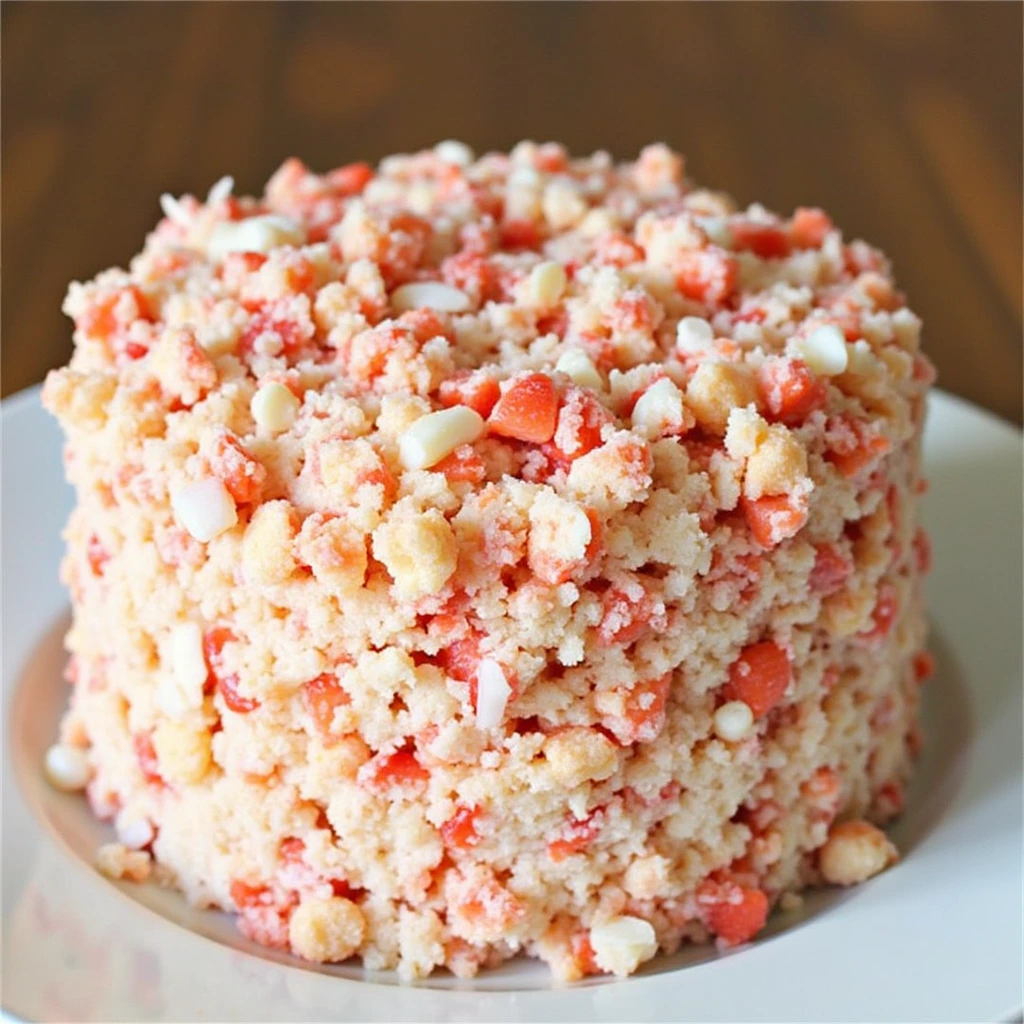
Step 8: Create the Signature Crunch Topping
Place the Golden Oreos and freeze-dried strawberries in a food processor and pulse until you have coarse crumbs. Mix in the melted butter and strawberry gelatin powder until the mixture resembles wet sand with beautiful flecks of pink throughout. This creates that nostalgic strawberry crunch texture that makes this cake so special.
Step 9: Assemble the Cake
Once the cakes have cooled completely, place one layer on your serving plate. Spread a layer of cream cheese frosting, then add the strawberry filling, leaving a half-inch border around the edge. Top with the second cake layer, then frost the top and sides with the remaining cream cheese frosting.
Step 10: Add the Crunch Topping
Press the crunch mixture onto the sides and top of the frosted cake, creating an eye-catching pink and golden pattern. You can apply it with your hands or gently press it on using a small baking sheet or piece of parchment paper.
Nutritional Information
| Nutrient | Amount per Serving (1 slice, 1/12 of cake) |
|---|---|
| Calories | 580 |
| Total Fat | 32g |
| Saturated Fat | 18g |
| Cholesterol | 120mg |
| Sodium | 380mg |
| Total Carbohydrates | 68g |
| Dietary Fiber | 1g |
| Sugars | 52g |
| Protein | 6g |
The provided nutrition information represents estimated values only. Actual numbers will vary depending on portion sizes, brand selections, measurement precision, and specific preparation methods employed.
Healthier Alternatives for the Recipe
Creating a more nutritious version of this strawberry crunch cake recipe doesn’t mean sacrificing flavor:
- Incorporate whole wheat pastry flour for approximately 50% of the unbleached flour measurement to introduce additional fiber without overwhelming the delicate flavor profile
- Reduce sugar in the cake by 25% (to 1½ cups) without significantly affecting texture
- Use Neufchâtel cheese instead of full-fat cream cheese to cut fat content by nearly a third
- Increase the fresh strawberry content and reduce sugar in the filling for more natural sweetness
- Try Greek yogurt cream cheese for the frosting to boost protein content
- For gluten-sensitive individuals, substitute with a 1:1 gluten-free flour blend (though texture may vary slightly)
These modifications can reduce calorie content by approximately 20% while maintaining the cake’s delightful flavor profile and iconic crunch topping.
Serving Suggestions
This strawberry crunch cake shines as a standalone dessert, but consider these creative serving ideas:
- Pair a slice with a scoop of vanilla bean ice cream for an indulgent à la mode experience
- Serve alongside a small glass of prosecco for adult celebrations, as the bubbles complement the sweet strawberry notes
- Create a dessert board with small cake slices, fresh strawberries, and vanilla cookies for a visually stunning presentation
- For brunch gatherings, serve thin slices with cold brew coffee for a perfect sweet-bitter balance
- Consider individual mini cakes using 4-inch springform pans for elegant personal portions
For an extra special touch, garnish each serving with a fresh strawberry fan and a light dusting of powdered sugar just before serving.
Common Mistakes to Avoid
Even experienced bakers can fall into these traps when making a strawberry crunch cake:
- Using cold ingredients: Ensure butter, eggs, and dairy are at room temperature for proper incorporation and even texture
- Overmixing the batter: This develops gluten and results in a tough, dense cake instead of a tender crumb
- Skipping the parchment paper: This simple step prevents the cake from sticking, especially important with this moist recipe
- Not cooling completely: Assembling the cake before it’s fully cooled will cause the frosting to melt and the layers to slide
- Adding warm filling: The strawberry filling must be completely cooled before assembly or it will soften the frosting
- Rushing the frosting process: Apply a thin “crumb coat” first, chill for 20 minutes, then apply the final frosting for a cleaner finish
- Making the crunch topping too fine: Pulse carefully to maintain some texture rather than creating powder
According to baking data, cooling issues account for nearly 40% of layer cake failures, so patience during this step is particularly crucial.
Storing Tips for the Recipe
Proper storage ensures your strawberry crunch cake remains fresh and delicious:
- Refrigerate the assembled cake, covered loosely with a cake dome or tent of aluminum foil, for up to 3 days
- For best texture, remove the cake from the refrigerator 30 minutes before serving to allow the frosting to soften slightly
- Individual slices can be frozen for up to 2 months: wrap tightly in plastic wrap, then aluminum foil, and place in a freezer-safe container
- To freeze unfrosted cake layers, wrap tightly in plastic wrap and aluminum foil; thaw in the refrigerator overnight before assembling
- Store the crunch topping separately in an airtight container if preparing components ahead of time to maintain its signature texture
- If you notice the crunch topping softening after refrigeration, you can refresh it by sprinkling a small amount of fresh topping before serving
Conclusion
This strawberry crunch cake recipe delivers the perfect balance of creamy, crunchy textures with bright strawberry flavor in every bite. With its nostalgic appeal and stunning presentation, it’s sure to become your new go-to celebration dessert that everyone will remember. I’d love to hear how your strawberry crunch cake turns out! Leave a comment below, share your photos in the review section, or subscribe for more delicious recipe updates.
FAQs
Can I make this strawberry crunch cake recipe ahead of time? Yes! You can bake the cake layers up to 2 days in advance and store them wrapped tightly at room temperature. The strawberry filling can be made 3 days ahead and refrigerated. Assemble the day before serving for best results.
Can I use strawberry cake mix instead of making the vanilla cake from scratch? Absolutely. While homemade delivers the best flavor, a strawberry cake mix can be a time-saving alternative. Just follow the box instructions and continue with the homemade filling, frosting, and crunch topping.
Why is my crunch topping getting soggy? The moisture from the frosting will eventually soften the topping. For best results, apply the crunch topping no more than 4 hours before serving, or keep some extra to sprinkle on just before serving.
Can I make this cake without dairy? Yes, you can substitute plant-based butter, non-dairy cream cheese, and almond or oat milk. The resulting dessert may have a slightly different mouthfeel, but will maintain its delicious strawberry flavor profile and satisfy both vegan guests and those with dairy sensitivities.
How can I enhance the strawberry flavor if my berries aren’t very sweet? Add 1/4 teaspoon of strawberry extract to the filling or 2-3 tablespoons of strawberry preserves to intensify the flavor without changing the texture significantly.
How do I achieve perfectly neat slices when serving this layered cake? For pristine, photo-worthy cake slices, run a chef’s knife under hot water for several seconds, wipe it completely dry, then make your cut in one smooth motion. Repeat this heating and drying process before each new slice to prevent frosting and filling from sticking to the blade and creating messy edges.