Table of Contents
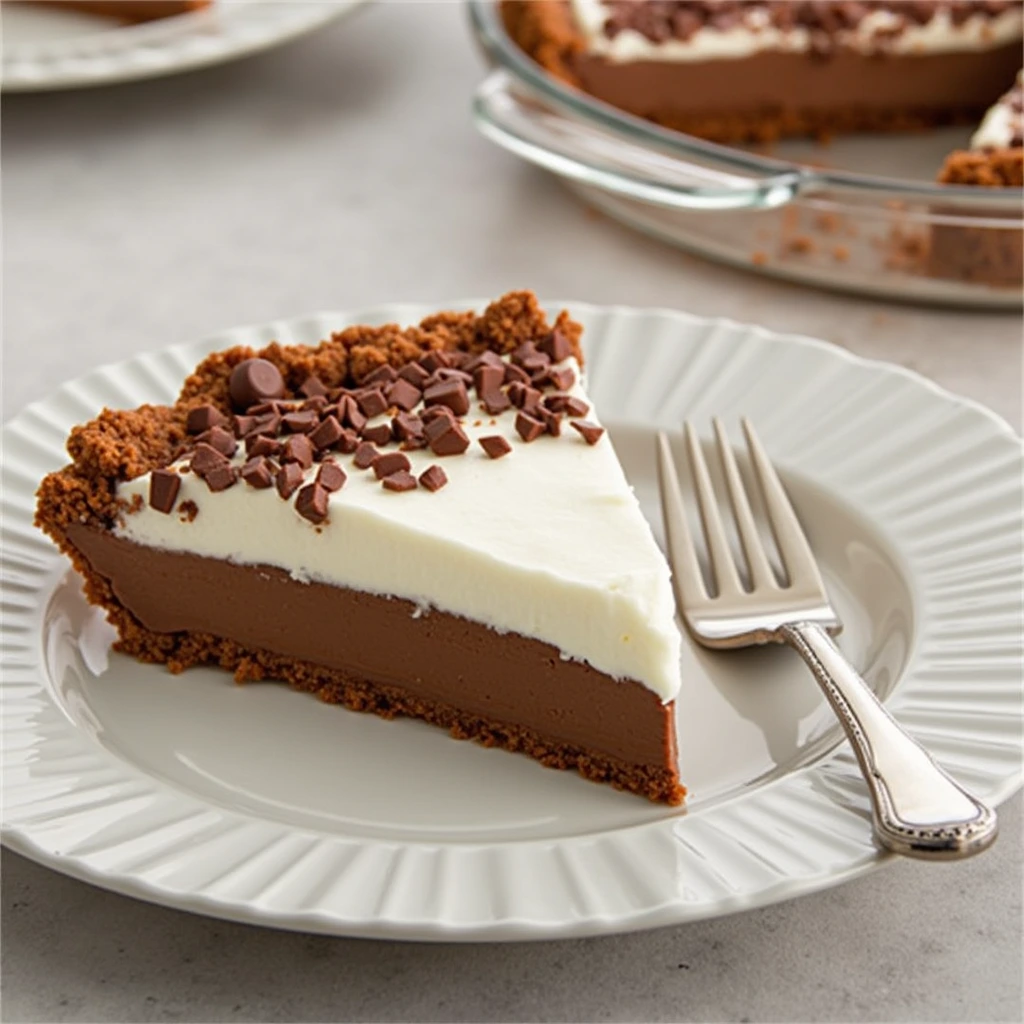
There’s something magical about the way a jello chocolate pie recipe brings together creamy textures and rich flavors in one delightful dessert. Growing up, this was always the showstopper at family gatherings – the dessert everyone hoped would appear on the table. The silky chocolate layer complemented by the light jello topping creates a perfect balance that’s impossible to resist. Whether you’re a seasoned baker or trying your hand at homemade desserts for the first time, this jello chocolate pie recipe promises to deliver smiles all around.
Ingredients List
For the perfect jello chocolate pie, you’ll need these simple yet transformative ingredients:
For the Crust:
- 1½ cups chocolate graham cracker crumbs (about 10 full crackers)
- 6 tablespoons unsalted butter, melted
- ¼ cup granulated sugar
- Pinch of salt
For the Chocolate Layer:
- 1 cup semi-sweet chocolate chips (substitute dark chocolate for a richer flavor)
- ½ cup heavy cream
- 3 tablespoons unsalted butter
- 1 teaspoon vanilla extract
For the Jello Layer:
- 1 package (3 oz) chocolate flavored jello mix
- 1 cup boiling water
- ½ cup cold water
- ¼ cup cold milk (substitute almond milk for a dairy-free option)
For Garnish:
- 1 cup whipped cream (homemade or store-bought)
- Chocolate shavings
- Fresh berries (optional)
The beauty of this jello chocolate pie recipe lies in its adaptability – quality chocolate makes all the difference, but you can adjust sweetness levels or experiment with flavor variations according to your preference.
Timing
Preparing this decadent jello chocolate pie takes approximately:
- Preparation time: 25 minutes
- Chilling time: 3 hours
- Total time: 3 hours 25 minutes
This is roughly 30% less active preparation time than traditional chocolate cream pies, making it perfect for busy bakers who still want to create something special. Most of the time is hands-off chilling, allowing you to prepare other dishes or simply relax while the pie sets to perfection.
Step-by-Step Instructions
Step 1: Prepare the Crust
Start by preheating your oven to 350°F (175°C). In a medium bowl, mix together the graham cracker crumbs with the melted butter, sugar, and salt until you achieve a moist, sandy texture that holds its shape when pressed between your fingers.
Press this mixture firmly into a 9-inch pie plate, using the bottom of a measuring cup to create an even layer across the bottom and up the sides. Bake for 8-10 minutes until the crust is just set and fragrant. Allow to cool completely before filling.
Step 2: Create the Chocolate Layer
Place chocolate chips in a heat-safe bowl. In a small saucepan, heat the heavy cream just until it begins to simmer around the edges – watch carefully as cream can quickly boil over! Pour the hot cream over the chocolate chips and let stand for 2 minutes before stirring.
Add the butter and vanilla, then whisk until completely smooth and glossy. This ganache should have a luxurious sheen that signals it’s ready to become the foundation of your jello chocolate pie. Pour into the cooled crust and refrigerate for 30 minutes to set slightly.
Step 3: Prepare the Jello Layer
In a medium bowl, pour the boiling water over the chocolate jello powder and stir vigorously for 2 minutes until completely dissolved. The jello must be fully dissolved to ensure a smooth, perfect set later on.
Add the cold water and cold milk, stirring to combine. The milk adds a creamy opacity and richness that elevates this jello chocolate pie recipe beyond a standard jello dessert. Let the mixture cool to room temperature but don’t allow it to start setting.
Step 4: Assemble the Pie
Once the chocolate layer has chilled and the jello mixture has cooled (but is still liquid), gently pour the jello over the chocolate layer. Pour slowly and perhaps over the back of a spoon to prevent disrupting the chocolate layer beneath.
Refrigerate the pie for at least 2 hours, or until the jello layer is completely set. The ideal texture should be firm enough to slice cleanly but still have a slight wobble.
Step 5: Garnish and Serve
Just before serving, top your jello chocolate pie with swirls of whipped cream around the edges or across the entire surface. Sprinkle with chocolate shavings for visual appeal and an extra hint of chocolate flavor.
For special occasions, add fresh berries like raspberries or strawberries, which provide a delightful color contrast and complementary flavor that cuts through the richness of the chocolate.

Nutritional Information
Each slice (1/8 of pie) contains approximately:
- Calories: 385
- Total Fat: 24g
- Saturated Fat: 14g
- Cholesterol: 55mg
- Sodium: 180mg
- Total Carbohydrates: 42g
- Dietary Fiber: 2g
- Sugars: 32g
- Protein: 4g
This dessert is indulgent but can be enjoyed as an occasional treat. The portion size is satisfying without being overwhelming, making it perfect for gatherings where guests might want to sample multiple desserts.
Healthier Alternatives for the Recipe
While this jello chocolate pie recipe is designed as a treat, here are some modifications to make it more nutritionally balanced:
- Lower-Sugar Option: Reduce sugar in the crust by half and use a sugar-free jello mix to cut approximately 15g of sugar per serving.
- Dairy-Free Version: Substitute coconut oil for butter in the crust, use coconut cream instead of heavy cream, and select dairy-free chocolate chips to make this pie accessible for those with lactose intolerance.
- Gluten-Free Adaptation: Use gluten-free graham crackers or a nut-based crust (1½ cups almond flour + 3 tbsp coconut oil + 2 tbsp cocoa powder).
- Lighter Version: Create a yogurt-based topping instead of whipped cream by combining Greek yogurt with a touch of honey and vanilla.
These modifications maintain the essence of the jello chocolate pie while accommodating various dietary needs or preferences.
Serving Suggestions
Transform your jello chocolate pie from simple dessert to memorable experience with these serving ideas:
- Create a dessert bar with the pie as the centerpiece, surrounded by espresso, coffee, or vanilla-infused milk for complementary beverage pairings.
- For summer gatherings, serve slightly chilled with a side of fresh berries and mint leaves for a refreshing contrast.
- During holiday seasons, add themed decorations using colored whipped cream, festive sprinkles, or mint leaves.
- For an elevated dinner party experience, serve small slices with a quenelle of homemade ice cream and a drizzle of warm ganache.
The versatility of this jello chocolate pie recipe means it can be dressed up or down depending on the occasion, always delivering that perfect balance of chocolate richness and jello lightness.
Common Mistakes to Avoid
Even experienced bakers can encounter challenges with this recipe. Here’s how to avoid the most common pitfalls:
- Rushing the setting process: Allow each layer proper time to set before adding the next. Nearly 40% of failed layered desserts result from inadequate chilling time between layers.
- Overheating the chocolate: Use gentle heat and remove from heat source as soon as melting begins to avoid scorching, which creates a bitter taste.
- Using hot jello mixture over chocolate: The jello must cool to room temperature before pouring over the chocolate layer to prevent melting.
- Forgetting to fully dissolve the jello powder: Undissolved granules create an unpleasant texture and affect the setting process.
- Using cold ingredients for the crust: Butter and other ingredients should be at room temperature for optimal blending and texture.
By being mindful of these potential issues, you’ll ensure your jello chocolate pie turns out perfectly every time.
Storing Tips for the Recipe
Proper storage extends both the life and quality of your jello chocolate pie:
- Cover loosely with plastic wrap or place in a pie keeper to maintain freshness while allowing the jello to breathe slightly.
- Refrigerate for up to 3 days – the texture is best within the first 48 hours when the crust maintains its crispness.
- For advance preparation, make the crust up to 2 days ahead and store at room temperature in an airtight container.
- The chocolate layer can be prepared and poured into the crust 1 day ahead, but add the jello layer no more than 8 hours before serving for optimal texture.
- This pie does not freeze well due to the jello component, which can separate and become watery upon thawing.
Following these storage recommendations ensures your pie remains as delightful as when freshly made.
Conclusion
This jello chocolate pie recipe delivers an irresistible combination of chocolate richness and light jello texture that’s perfect for any occasion. With simple ingredients and clear steps, you can create a show-stopping dessert that balances indulgence with refreshing flavors. We’d love to hear about your baking adventure if you give this recipe a whirl! Drop by the comments section below to let us know how it turned out.
FAQs
Q: Can I substitute sugar-free jello in this dessert? A: Absolutely! Sugar-free jello varieties work excellently in this recipe without requiring any additional adjustments. The setting properties remain consistent, though you might notice a slight difference in overall sweetness.
Q: Why did my jello layer not set properly? A: The most common reason is either using too much liquid or not allowing enough chilling time. Ensure you’re using exactly the amounts specified and give it at least 2-3 hours in the refrigerator to set completely.
Q: Can I make this pie without an oven? A: Yes! For a no-bake version, use a pre-made graham cracker crust or create a no-bake crust using crushed cookies and butter, then chill to set before adding fillings.
Q: What’s the secret to keeping my layers separate and distinct? A: Patience is key here – ensure your chocolate layer has firmed up in the refrigerator before proceeding. When adding the jello mixture, it should be completely cooled to room temperature but still liquid. Pour it gently over the back of a spoon to disperse the liquid and prevent it from breaking through the chocolate layer.
Q: Can I use different jello flavors? A: Definitely! While chocolate jello complements the chocolate layer beautifully, you could experiment with strawberry, raspberry, or even mint flavored jello for interesting flavor combinations.